Automating Infrastructure as Code: Planning and Applying Terraform Changes through Jenkins Declarative Pipeline


In the world of DevOps and infrastructure management, the need to efficiently provision and manage resources has never been greater. Terraform, an Infrastructure as Code (IaC) tool, allows us to define and automate our infrastructure, and Jenkins, a popular Continuous Integration and Continuous Delivery (CI/CD) tool, can help orchestrate these Terraform workflows seamlessly. In this blog post, we will explore how to utilize a Jenkins declarative pipeline to plan and apply Terraform changes, ensuring consistency and reliability in infrastructure management.
Prerequisites
Before diving into the details, let's ensure we have the necessary prerequisites in place:
Jenkins Installation: You should have Jenkins installed and configured on a server.
Version Control System: Your Terraform code should be organized in a version-controlled repository (e.g., GitHub or GitLab).
Setting Up Jenkins and Terraform Integration
Step 1: Setup webhook in your GitHub repository
The first step is to set a webhook in your GitHub code repository so that the Jenkins pipeline gets automatically triggered when code is pushed to the repository.
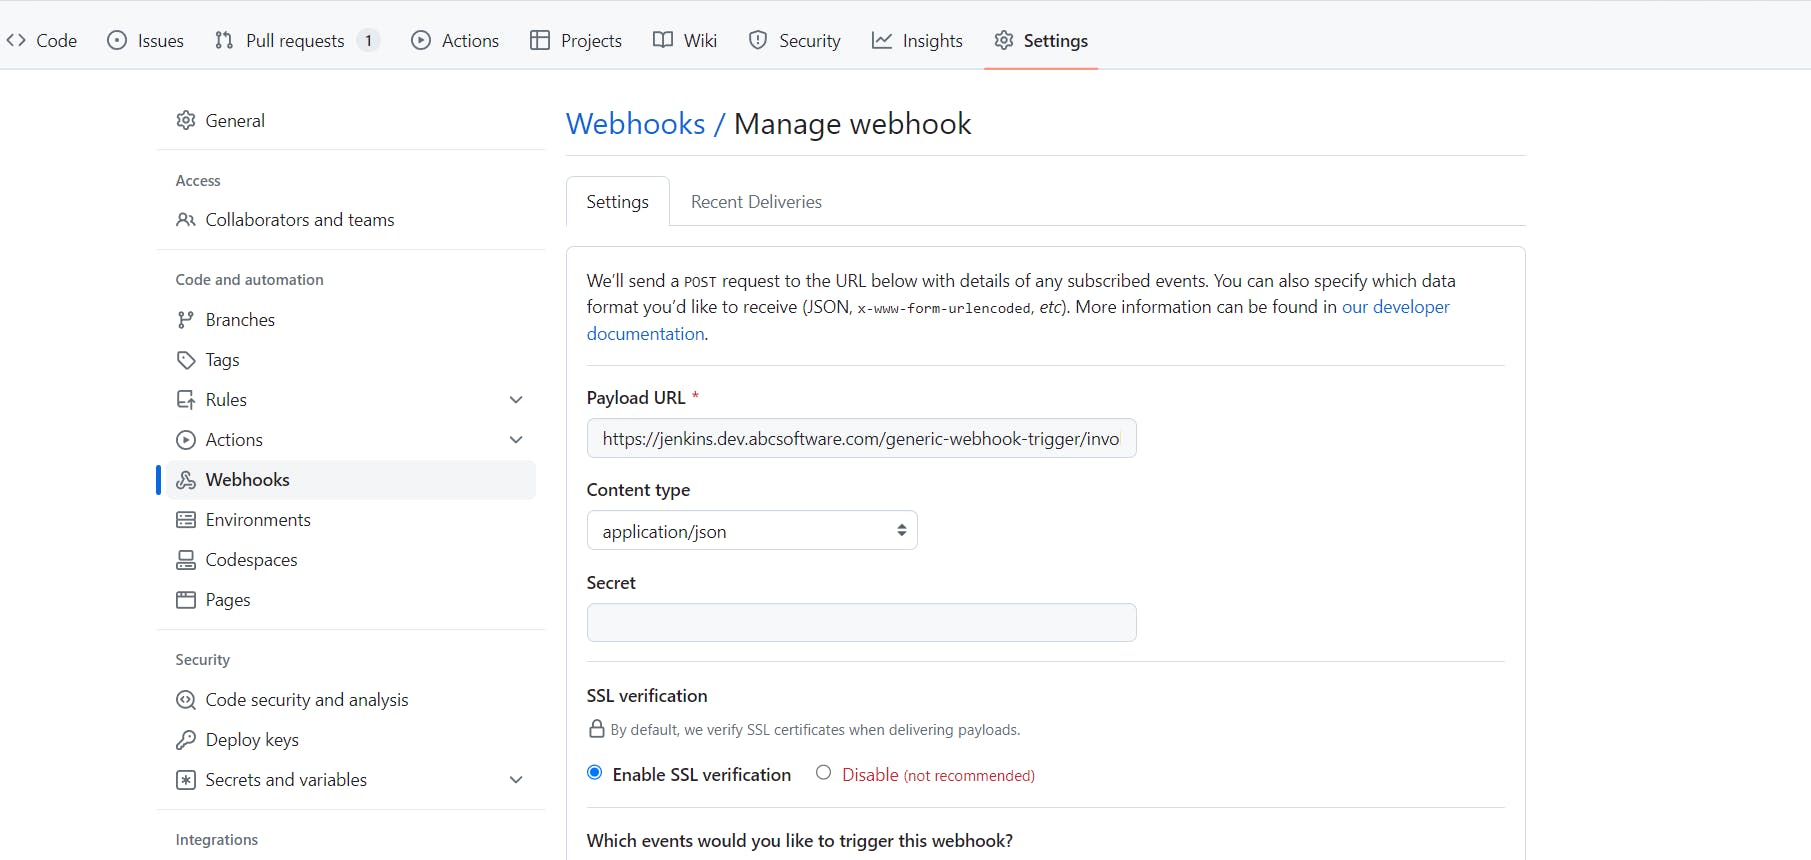
The value of the Payload URL should be in the format https://<your_Jenkins_url>/generic-webhook-trigger/invoke?token=<jenkins_token_value>
We will be creating a Jenkins token while configuring the pipeline.
NOTE: We will configure our Jenkins job in such a way that it shall only get executed when a PR is being raised, any changes in the PR are being done or a PR gets merged with the dev branch inside our GitHub repository. The PR must be raised from a branch name starting with "feature".
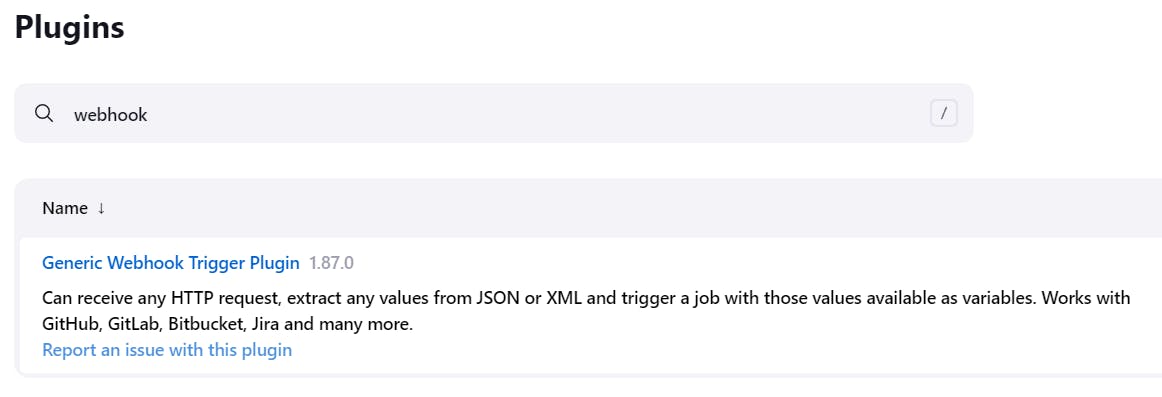
Step 2: Install Generic Webhook Trigger Plugin
Visit the Jenkins Plugin Manager and search for the "Generic Webhook Trigger" plugin & install it.
Step 3: Configure the Pipeline
Create a new pipeline job and select "Pipeline" as the project type. In the pipeline configuration:
Check "Generic Webhook Trigger" under "Build Triggers".

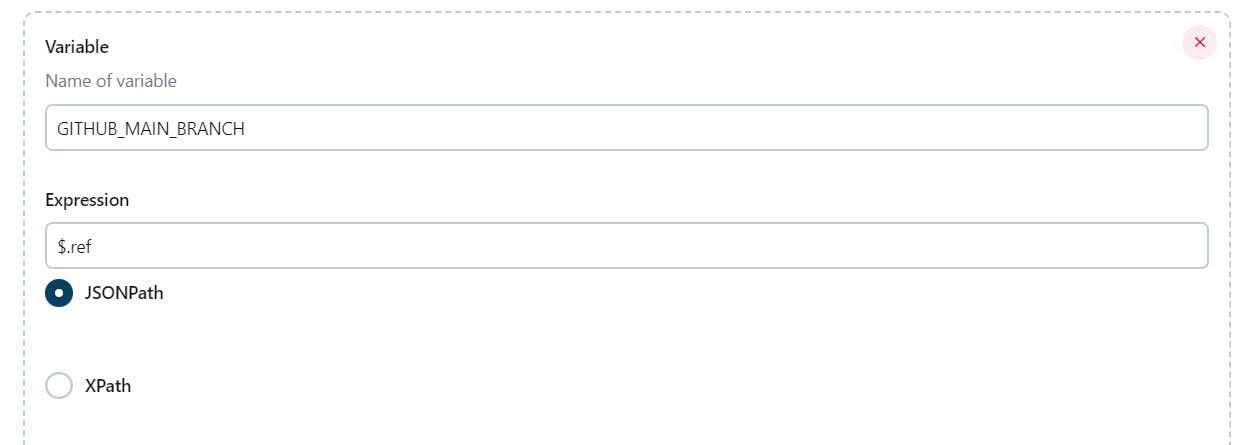
Under Post content parameters, enter required variables and expression values. Keep in mind to use the valid expressions as below.
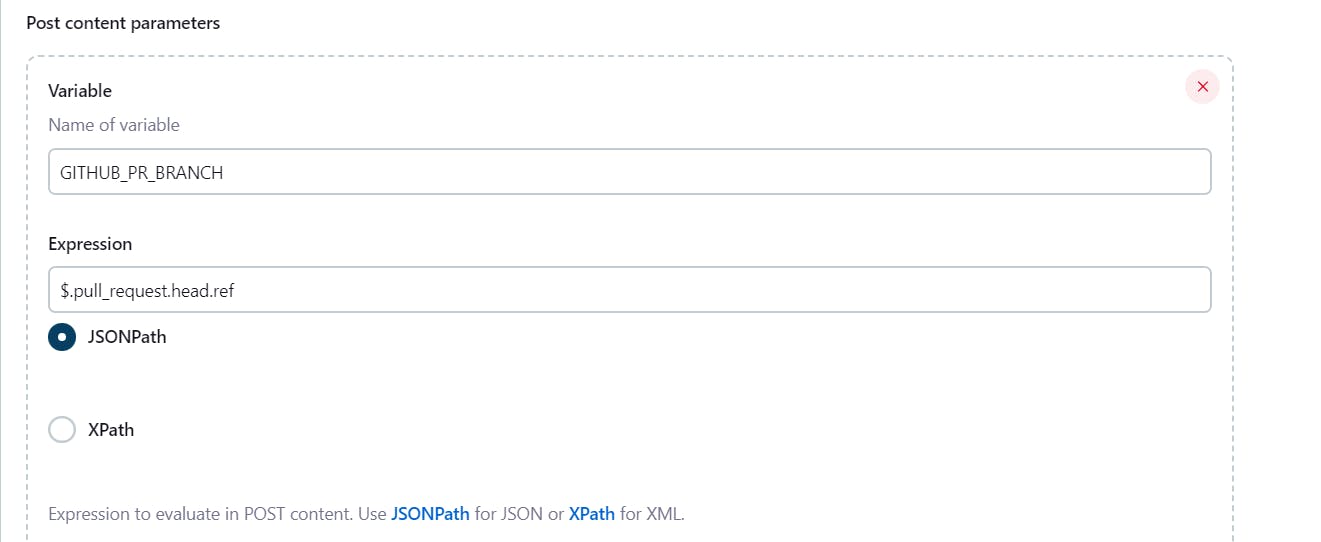
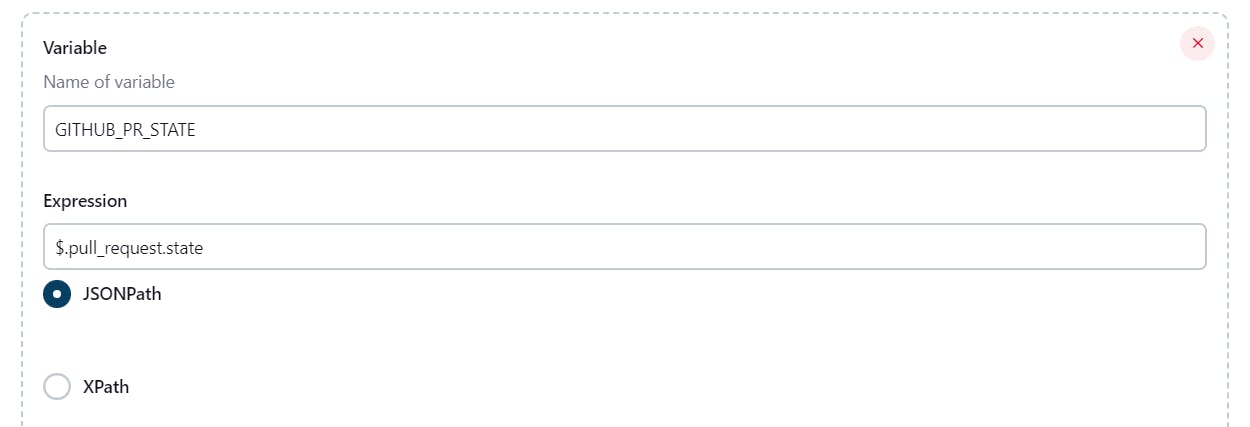
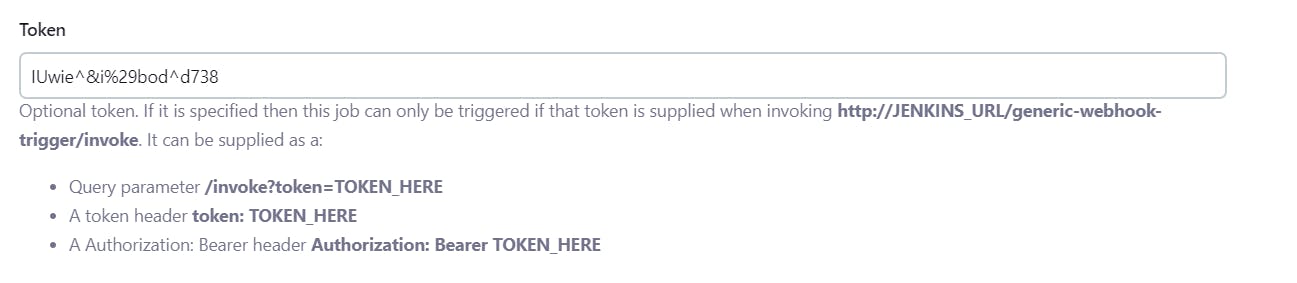
Enter a token.
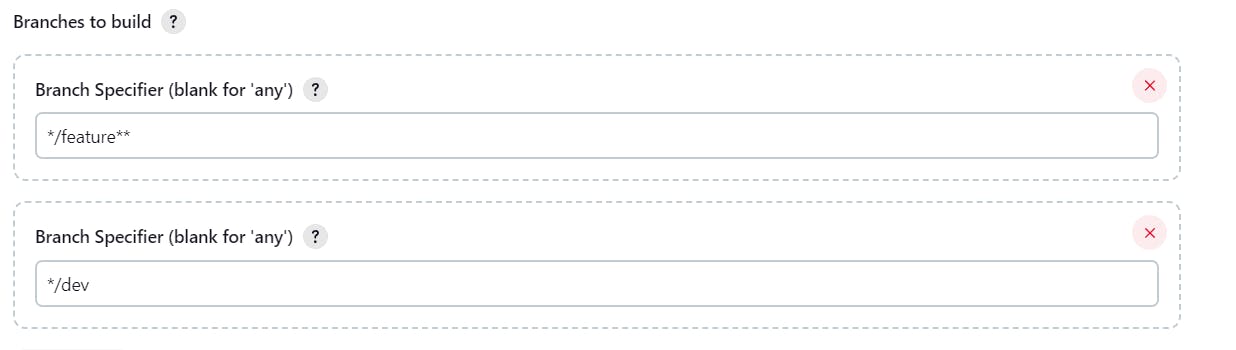
Under "Pipeline Definition," choose "Pipeline script from SCM." Select your version control system (e.g., Git) and provide the repository URL and credentials if necessary. Specify the branch/es you want to build.
Define the script path and save the configuration.

Step 4: Create a Jenkinsfile
In your Terraform project's repository, create a Jenkinsfile to define your pipeline stages and steps. Below is the Jenkinsfile:
///////////////////////////////////////////////////////////////////////////////////////////////////////////////////////
// CALCULATED VARIABLES
LABEL_NAME          = 'terraform-deployer-' + new Date().getTime()
AWS_ENVIRONMENT     = 'dev'
AWS_REGION          = 'us-east-1'   // Change this to your desired region
TERRAFORM_WORKSPACE = AWS_ENVIRONMENT + '_' + AWS_REGION
///////////////////////////////////////////////////////////////////////////////////////////////////////////////////////
environment {
    GIT_SSH_COMMAND       = "ssh -o UserKnownHostsFile=/dev/null -o StrictHostKeyChecking=no"
    AWS_ACCESS_KEY_ID     = credentials('aws-access-key-id')
    AWS_SECRET_ACCESS_KEY = credentials('aws-secret-access-key')
}

pipeline {
    agent {
        kubernetes {
            label "$LABEL_NAME"
            yaml '''
apiVersion: v1
kind: Pod
spec:
  containers:
  - name: terraform
    image: alpine:3.16
    command:
      - cat
    tty: true
    env:
      - name: AWS_ACCESS_KEY_ID
        value: "${AWS_ACCESS_KEY_ID}"
      - name: AWS_SECRET_ACCESS_KEY
        value: "${AWS_SECRET_ACCESS_KEY}"
      - name: AWS_DEFAULT_REGION
        value: "${AWS_REGION}"
'''
        }
    }


    stages {
      stage('Prepare') {
        steps {
          container('terraform') {
            sh '''
              apk add --no-cache \
                zip \
                wget \
                git \
                bash \
                openssh-client \
                curl \
                screen \
                git-lfs \
                python3 \
                py3-pip \
                gcc \
                build-base \
                jq
              pip3 install --upgrade pip
              pip3 install --no-cache-dir \
                  awscli
              rm -rf /var/cache/apk/*
            '''
            install_terraform()
        }
        }
      }

      stage('AWS Configure') {
        steps {
          container('terraform') {
            script {
                sh """
                aws configure set aws_access_key_id $AWS_ACCESS_KEY_ID
                aws configure set aws_secret_access_key $AWS_SECRET_ACCESS_KEY
                aws configure set default.region $AWS_REGION
                """
            }
          }
        }
      }

      stage('TF Plan') {
        when {
          expression {
            echo "Git branch is ${env.GITHUB_PR_BRANCH}"
            echo "PR state is ${env.GITHUB_PR_STATE}"
            echo "Git main branch is ${env.GITHUB_MAIN_BRANCH}"
            return env.GITHUB_MAIN_BRANCH == 'refs/heads/dev' || env.GITHUB_PR_BRANCH.contains('feature/') && env.GITHUB_PR_STATE == 'open'
          }
        }
        steps {
          container('terraform') {
              sshagent (credentials: ['github']) {
                script {
                  terraformAction('plan')
                }
              }
          }
        }
      }

      stage('TF Apply') {
        when {
          expression {
            echo "Git main branch is ${env.GITHUB_MAIN_BRANCH}"
            return env.GITHUB_MAIN_BRANCH == 'refs/heads/dev'
          }
        }
        steps {
          container('terraform') {
              sshagent (credentials: ['github']) {
                script {
                  input message: 'Do you want to apply the changes?', ok: 'Apply'
                  terraformAction('apply')
                }
              }
          }
        }
      }
    }
    post {
        failure {
          slackSend channel: "jenkins", message: "Build Failure details: \n JobName: ${env.JOB_NAME} \n JobURL: ${env.BUILD_URL}"
        }
    }
}

def terraformAction(action) {
  sh """
    terraform version
    terraform init -no-color
    # Select workspace
    terraform workspace select "${TERRAFORM_WORKSPACE}"
    if [[ "${action}" == "apply" ]]
    then
      terraform apply -no-color -lock-timeout=600s -auto-approve -var region="${AWS_REGION}" -var environment="${AWS_ENVIRONMENT}"
    elif [[ "${action}" == "plan" ]]
    then
      terraform plan -no-color -lock-timeout=600s -var region="${AWS_REGION}" -var environment="${AWS_ENVIRONMENT}"
    fi
  """
}

def install_terraform() {
  sh '''
    wget --quiet https://releases.hashicorp.com/terraform/1.2.3/terraform_1.2.3_linux_amd64.zip -O /tmp/terraform.zip
    unzip /tmp/terraform.zip
    mv terraform /usr/local/bin/terraform
    chmod +x /usr/local/bin/terraform
    rm -f /tmp/terraform.zip
  '''
}
This Jenkinsfile performs several essential steps:
Initializes the Terraform workspace using
terraform init.Creates a Terraform execution plan using
terraform planand saves it astfplan.Prompts for user input to confirm applying the plan.
If approved, applies the Terraform changes using
terraform applywith the saved plan.Sends you Slack notification on job failure, if Jenkins is integrated with Slack.
Step 6: Save and Commit Jenkinsfile
Save the Jenkinsfile in your project's repository and commit it to your version control system.
Conclusion
In this blog post, we've explored how to harness the power of Terraform and Jenkins to automate the planning and application of infrastructure changes.
Now that you've learned how to automate Terraform changes with Jenkins, you can start building robust CI/CD pipelines for your infrastructure projects, reducing manual errors, and accelerating your development and deployment processes. Happy automating!